Get Active Developer Badge on Discord : In this article I’m going to show you an new updated way on how to get this Discord active developer badge without having to worry about replit because unfortunately replit doesn’t work anymore it got patched so what we need to do first is we need to go to the first Link and this is both for mobile and desktop devices I’ll show you how to do it for both devices but we need to go to the first link BELOW IN ARTICLE. OR CLICK HERE
Steps to get Active Developer Badge on Discord
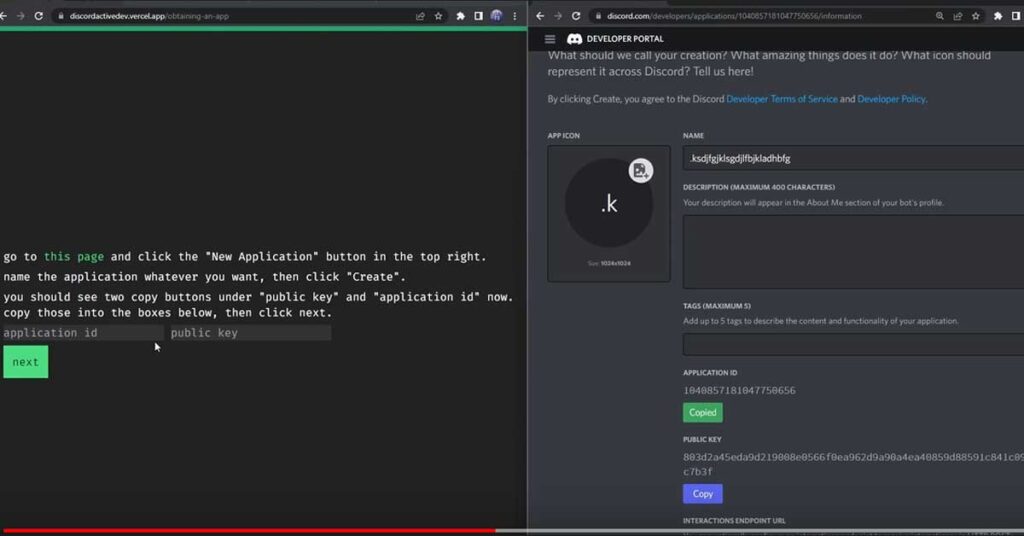
STEP 1 : Click on the new application, name it whatever you want then click on the little check box and click create.
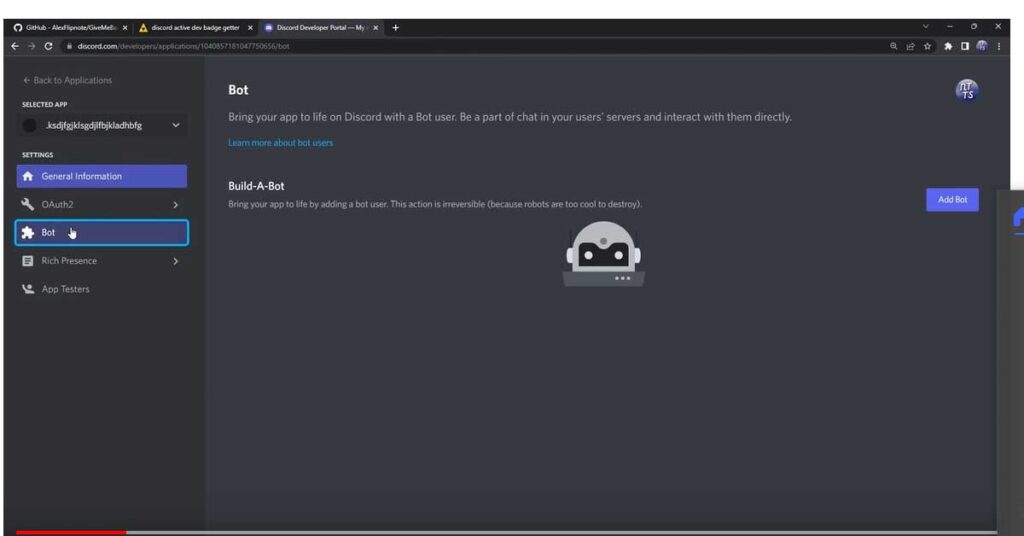
STEP 2 :Click on Left side bot button add bot click yes do it
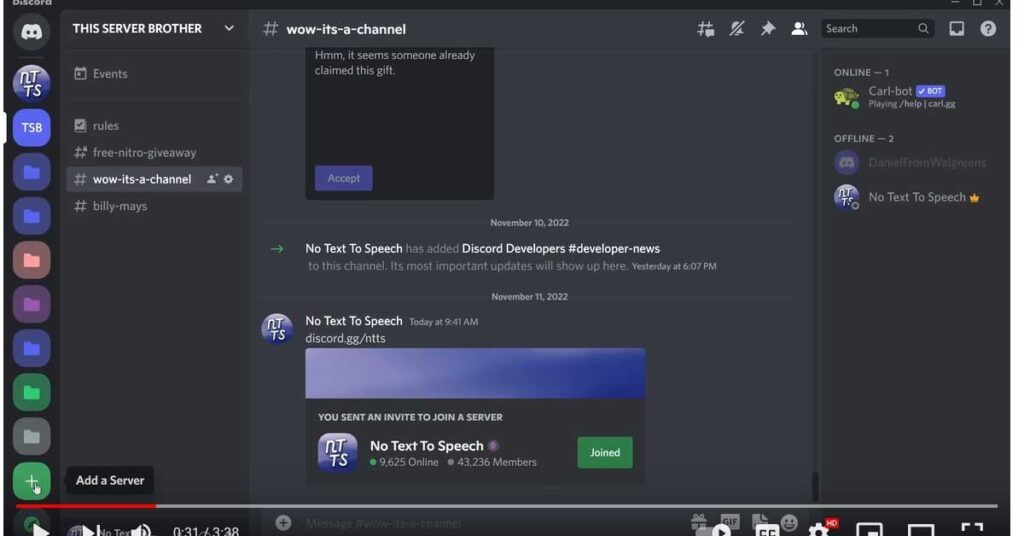
STEP 3: Goto on Discord Window Create New Server.
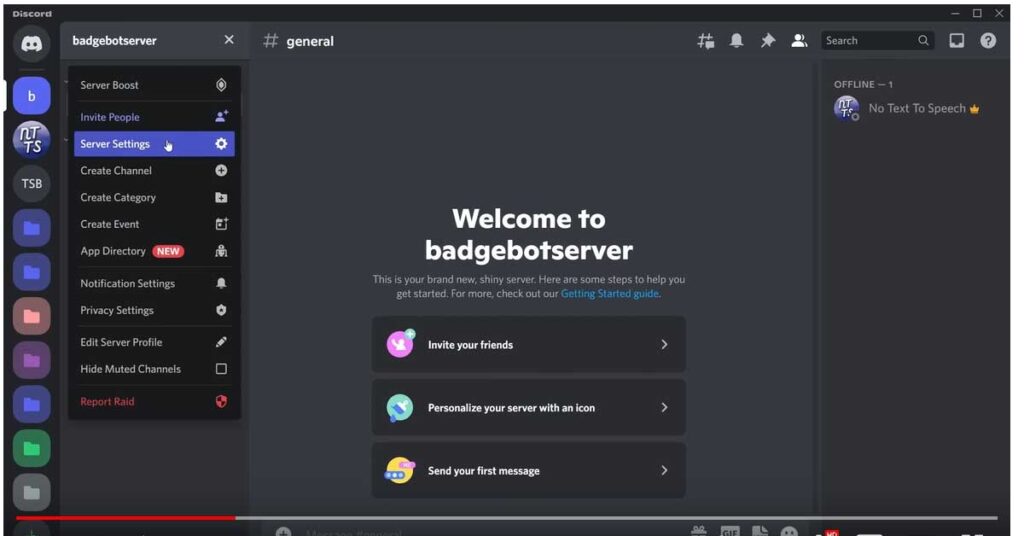
STEP 4:Click on Server Settings
STEP 4:then scroll down and enable Community click get started Tick check both of these boxes
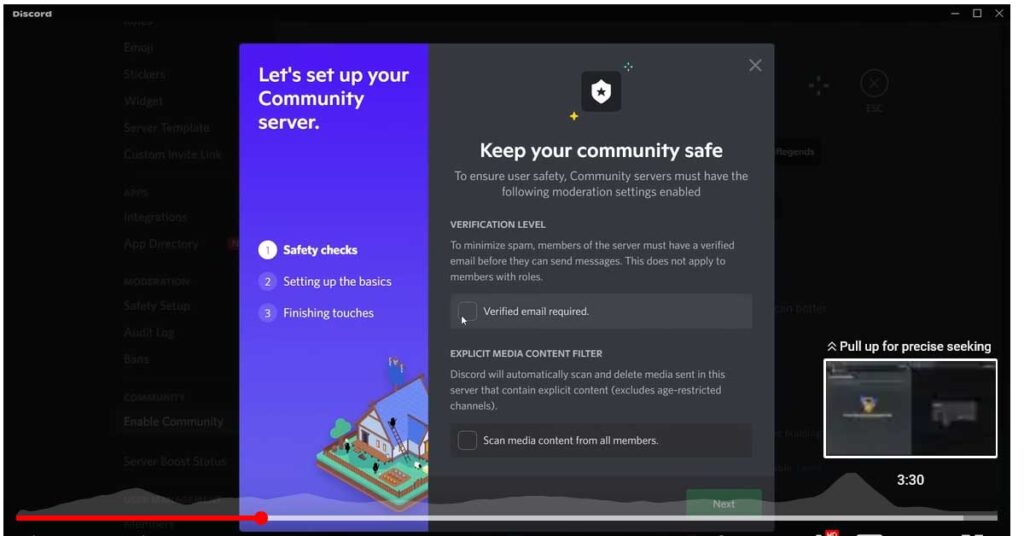
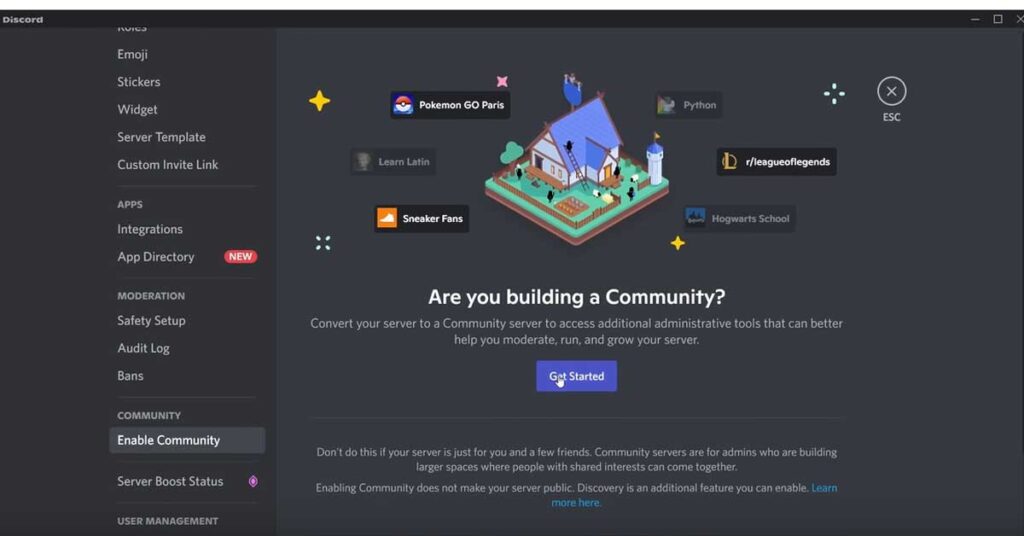
STEP 6: click next click next and I agree and understand and click finish setup
STEP 7: Now Click HERE to Setup Badge.Open Both windows in same time
STEP8: Now you want to go to the bot that you created now just keep in mind the process is exactly the same on mobile
STEP 9: you just need to go to your Bot go to application ID and copy it and paste that in and then paste in your public key
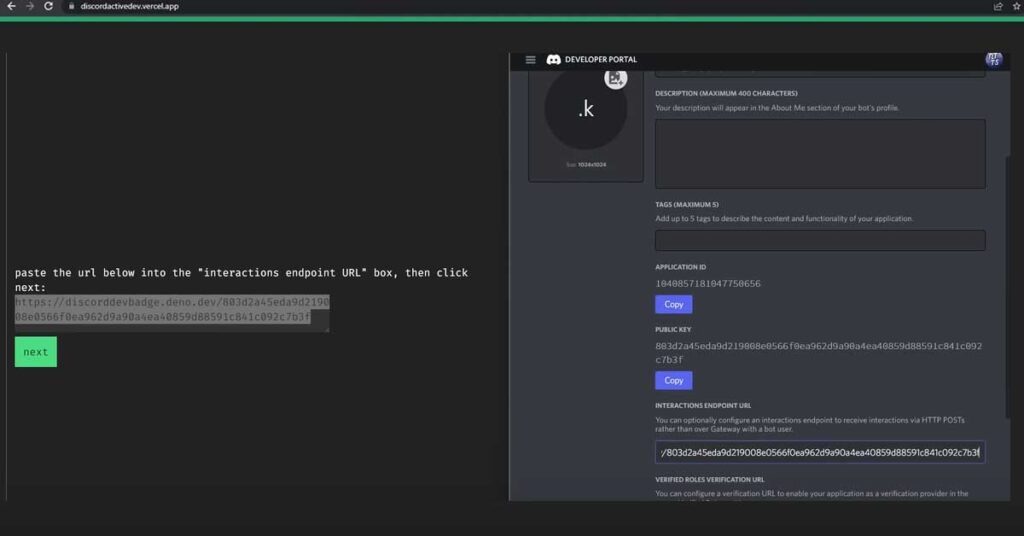
STEP 10:then once you do that click on next and what we need to do is we need to copy this link here and paste it into the interactions endpoint URL
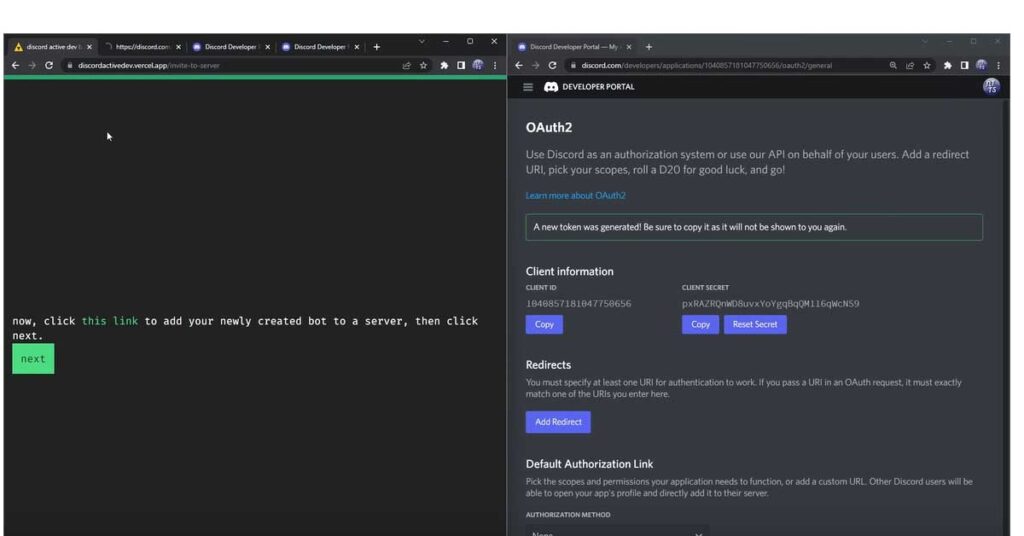
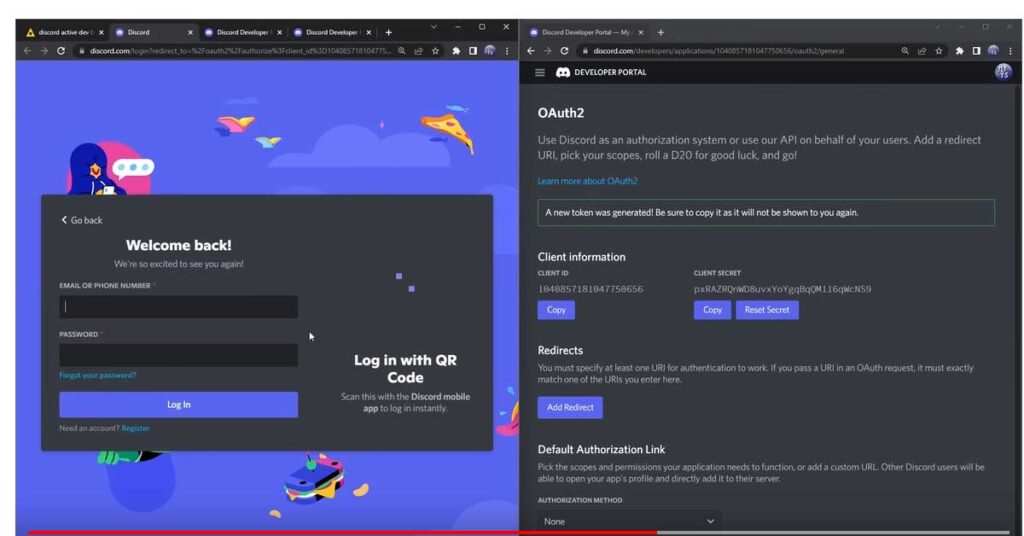
STEP 11: click on next and we need to go to the oauth tab so so we need to click on the little hamburger menu click on oauth 2 and then you will see this CLIENT SECRET
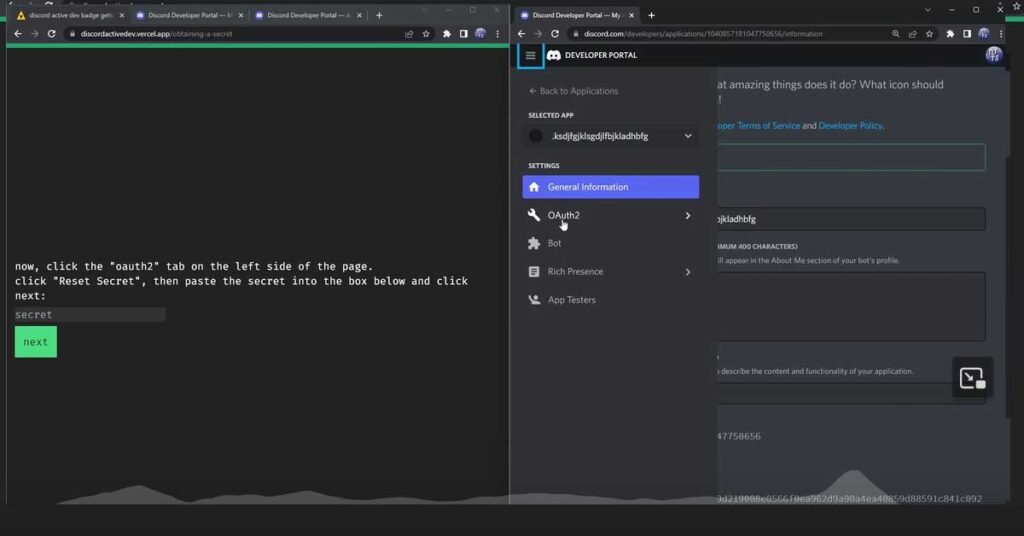
STEP 12:we want to reset our secret click yes do it enter in your two-factor authentication code
STEP 13:Once you do that you want to copy your client secret you want to paste it into the website and click next
STEP 14: then you just need to open this link in a new tab and it will be an invite link for the bot to join your server Login in to account
STEP 15: so it’s the same as always make sure you invite it to your badgebot server click on authorize
STEP 16: then all you need to do is just go on to your server and you want to do slash and we just need to do slash finish then press enter and press enter

STEP 18: then it’ll say hi there now that a command has been ran you can click on this link here which will be the fourth Link in the Article .
STEP 19: but when you open up this link it will take you to this little page here the active developer badge now the thing with this page is that it takes Discord 24 hours for them to update whether or not your Bot ran a slash command so you will need to wait 24 hours
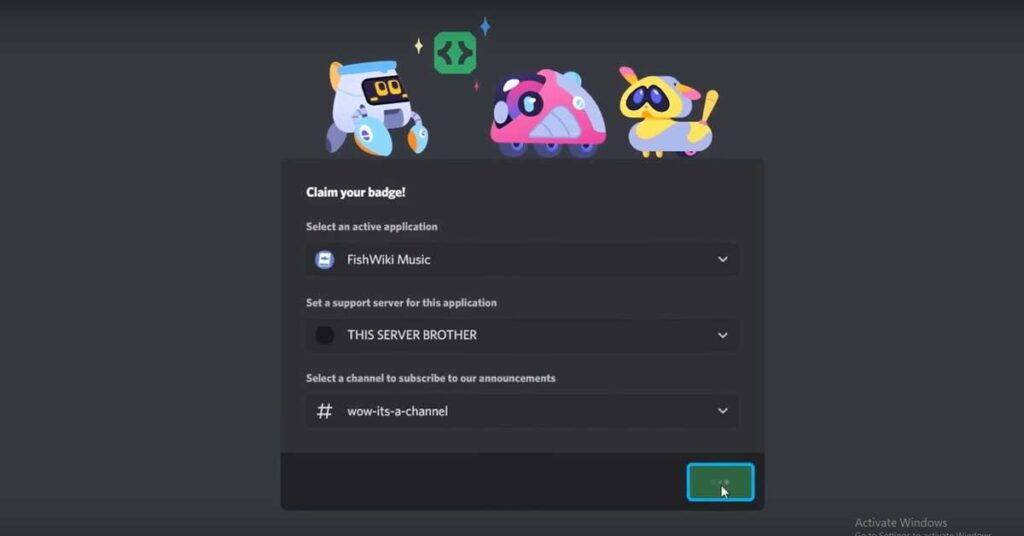
STEP 21: Once you do that you just need to go through this application process it’s really straightforward just select your server select the channel then click authorizing then you have a badge
Now once you redeem your badge there’s go back to the Discord developer portal and go back to this oauth 2 screen and I just want you to reset your client secret one more time this is just so everything is completely good and your secret is secured and once you reset it
ALL LINKS GIVEN BELOW: